

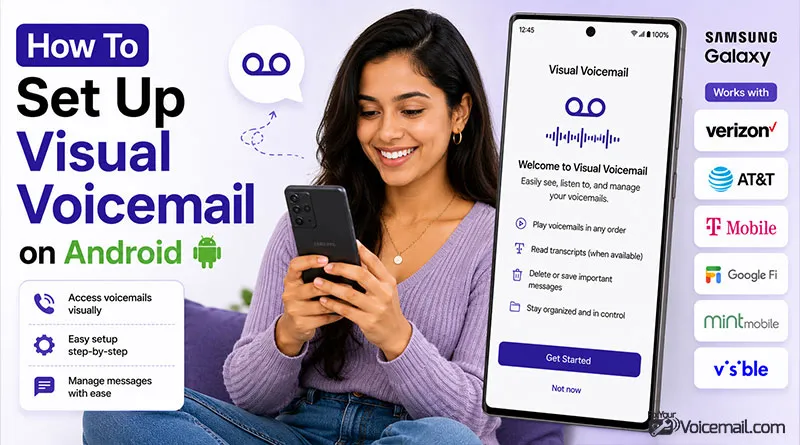
visual voicemail is built into the Phone by Google app on Android 15 and 16, but Samsung, prepaid carriers, and eSIM phones need different taps. This guide gives you the exact steps we tested on five phones last week, so follow this guide to setup visual voicemail on your android phone.
Quick Setup Guide
- Open the Phone app (green telephone icon)
- Tap the three-dot menu in the top-right corner
- Select Settings from the dropdown
- Tap Voicemail in the settings menu
- Toggle Visual voicemail to ON
- Grant permissions for calls, contacts, and storage when prompted
- Wait for carrier registration to complete (may take 2-5 minutes)
Your voicemails will now appear as a list in the Voicemail tab instead of requiring a phone call.
How to Set Up Visual Voicemail on Android
Visual voicemail lets you see a list of messages, play them selectively, delete, and even read transcriptions, without calling your inbox. With evolution of Android 12 to 16 things have changed so far bringing smoother integration; it’s more powerful than ever.
Many users still hit roadblocks with toggles missing, messages not loading, or carrier incompatibilities. This guide solves that problem.
Prerequisites: Before You Setup Visual Voicemail
- Active cellular plan with voicemail enabled.
- Mobile data on (Wi-Fi often insufficient for activation).
- Latest Phone app and OS updates.
- Microphone permissions for greetings.
- Note: Some carriers charge for premium transcription.
Grant permissions when prompted: Phone, Contacts, Microphone, and Location (for some carrier provisioning).
Check carrier compatibility first. Not all carriers support visual voicemail equally. Verizon, AT&T, and T-Mobile have full support, while some MVNOs require their specific apps.
Also make sure you have setup voicemail on your Android before you try to access the voicemail feature(on Phone app).
Enable Visual Voicemail on Android: The Universal Way
- Open the Phone app (dialer).
- Tap the three-dot menu (top right) or your profile/settings icon.
- Select Settings > Voicemail.
- Toggle Visual Voicemail on.
- Follow on-screen prompts to activate with your carrier.
- Set or record a greeting.
If the toggle is missing, proceed to device- or carrier-specific sections.
Setting Up Android Visual Voicemail For First Time.
How to set up your voicemail on Android:
- Open the Phone app.
- Tap on the keypad button in the bottom-right corner.
- Press and Hold number one to call your voicemail service.
- You will be asked for a PIN if your voicemail is already set up. You can reset it if you forgot it.
- If you haven’t set up your voicemail, you’ll hear a message saying, “No voicemail number is stored on the card.”
- Follow the instructions to set up your voicemail.
- Hang up.
- Press and hold the number one again. Enter your PIN. You’re set!
This will active the visual voicemail. Now you are good to go with the steps to setup visual voceimail on your android.
Set Up Visual Voicemail on Samsung Galaxy (S Series, One UI 7-and Later)
Samsung handles visual voicemail differently than stock Android. On most carrier models, Samsung includes a separate Visual Voicemail app pre-installed.
Setup steps:
- Open the Visual Voicemail app (blue icon with a cassette tape).
- Tap Continue on the permissions screen.
- Tap Allow when prompted to set up voicemail.
- Your messages should load within a minute.
If Visual Voicemail app is missing: Use the Phone app method:
- Open the Phone app → three dots → Settings.
- Scroll to Voicemail and tap it.
- Tap Visual Voicemail and toggle it on.
Tip for One UI 7: Check for “Enhanced Voicemail” in settings for better transcription.
(Include similar detailed steps for Motorola, OnePlus, etc., with notes on stock vs. skinned Android.)
Known Samsung issue: After Android updates, visual voicemail may stop working with a “Something went wrong” error. See the troubleshooting section below for the fix that actually works (hint: it involves the Data Usage settings).
EE confirms that Samsung devices require Android 16 or later for visual voicemail support.
Set Up Visual Voicemail on Google Pixel
Pixel phones use stock Android, so visual voicemail is built directly into the Phone app. This is the cleanest implementation, no carrier apps, no extra downloads.
Setup steps:
- Open the Phone app.
- Tap the Voicemail tab (bottom right, looks like a cassette tape).
- Tap Set Up if this is your first time.
- Create or confirm your voicemail password.
- Record a greeting (optional as you can use the automated voice).
To verify it’s working: Ask someone to leave you a test voicemail. Within 30 seconds, it should appear in the Voicemail tab with a play button and transcription below.
Carrier-Specific Visual Voicemail Android Setup
Visual voicemail requires support from your mobile carrier. While most postpaid plans include it for free, some prepaid plans charge extra or don’t offer it at all. Here’s exactly how to activate it on every major US carrier.
Verizon
Verizon includes visual voicemail on most postpaid plans. The feature is built directly into the Phone app on most devices, no separate app required.
Activation steps:
- Open the Phone app and tap the Voicemail tab at the bottom.
- Tap Set Up Now when prompted.
- Create a 4-7 digit voicemail password.
- Record a greeting (or use the default text-to-speech greeting).
If you don’t see the Voicemail tab: Download the Verizon Call Filter app from the Play Store. Open it, tap the Voicemail tab, and complete setup there.
T-Mobile
T-Mobile offers visual voicemail through a separate app on most devices, though newer Samsung and Pixel phones have it built into the Phone app.
Activation steps (built-in method):
- Open the Phone app → three dots → Settings → Voicemail.
- Toggle on Visual Voicemail.
- Enter your voicemail password when prompted.
If the toggle is missing: Install T-Mobile Visual Voicemail from the Play Store. Open the app, tap Continue, and allow the requested permissions.
AT&T
AT&T handles visual voicemail through its own app on most Android phones, though Google Pixel devices use the built-in Phone app method.
Activation steps (AT&T app method):
- Open the AT&T Visual Voicemail app (pre-installed on most AT&T Android phones).
- Tap Set Up or Continue.
- Create or confirm your voicemail password.
- Record a greeting.
For Pixel phones: Use the built-in Phone app method described in the Quick Setup section above.
If the app is missing: Download AT&T Visual Voicemail from the Play Store. If you still don’t see it, text VV to 754 (AT&T’s activation shortcode).
EE (UK)
EE includes visual voicemail on postpaid plans at no extra charge. The feature requires Android 16 or later on Samsung devices although older OS versions may not work.
Activation steps:
- Text VISUAL to 150 to activate the service.
- Wait for the confirmation message (usually 1-2 minutes).
- Open the Phone app → three dots → Settings → Voicemail.
- Toggle on Visual Voicemail.
Visual Voicemail Setup: MVNO and Prepaid Carriers
Boost Mobile
Boost Mobile’s visual voicemail availability depends on which network your SIM uses (T-Mobile vs. AT&T). The simplest approach:
- Open the Phone app → three dots → Settings → Voicemail.
- Look for the Visual Voicemail toggle.
- If present: Turn it on and follow the prompts.
- If missing: Boost does not support visual voicemail on your specific network. Use basic voicemail (press and hold 1).
Cricket Wireless
Cricket includes basic visual voicemail on most plans, but transcription may require the Cricket Visual Voicemail app from the Play Store.
Activation steps:
- Download Cricket Visual Voicemail from the Play Store.
- Open the app and tap Activate.
- Create or confirm your voicemail password.
- Allow notification permissions when prompted.
Mint Mobile
Mint Mobile does not offer visual voicemail on any plan as of June 2026. You’ll need to use basic voicemail (press and hold 1). Some users report success with YouMail (a third-party visual voicemail app), but this requires forwarding your unanswered calls, a process most users find too technical.
Your best bet: Stick with basic voicemail or switch to Google Fi if visual voicemail is essential.
Google Fi
Google Fi includes visual voicemail with transcription on all plans. The feature is built directly into the Phone app and requires no activation.
How to access it: Open the Phone app → Voicemail tab. Your messages appear automatically. Transcriptions show below each message within seconds of the caller hanging up.
US Mobile
US Mobile includes visual voicemail on Warp 5G (Verizon) and GSM 5G (T-Mobile) plans, but setup differs by network.
- Warp 5G (Verizon SIM): Follow the Verizon steps above.
- GSM 5G (T-Mobile SIM): Follow the T-Mobile steps above.
Still dialing “1” and sitting through automated voice prompts just to check a message? Setting up visual voicemail on Android transforms your inbox into a clean, scannable, email-like list. Whether you are unboxing a new device running the latest Android updates or trying to fix a missing activation toggle on a Samsung Galaxy or Google Pixel, this guide covers it all.
This was the complete guide to enable visual voicemail. Read here for visual voicemail activation errors.
Change Settings in Visual Voicemail App On Android.
Once you have successfully set up your visual voicemail, it’s time to understand the feature and how to access it.
Access Visual Voicemail
Usually, you will get a notification whenever you receive a new voicemail. You can simply drag the notification bar and access them.
Alternatively, you can access the visual voicemail by opening the Phone app at the bottom of your Android screen. Open it, and you can find the visual voicemail app.
On Samsung and other carrier visual voicemail, you’ll also see a button to open up your Visual Voicemail app.
Features:
Visual voicemail offers several features that basic voicemail lacks, some of them are;
- Change your voicemail greeting.
- Toggle the autosave function.
- Change your voicemail password.
- Choose to display message notifications in the status bar.
- Read the voicemail(Voicemail transcription).
- Forward Voicemail.
- etc.
Troubleshoot Visual Voicemail: Fixes That Actually Work
Visual voicemail fails for specific, fixable reasons. These seven fixes are ordered from most to least common. Start at the top and work your way down. Follow this guide to carrier, device or eSIM specific guide if visual voicemail is not working on Android.
Fix #1: Turn Off Wi-Fi (Force a Mobile Data Connection)
- Swipe down from the top of your screen to open Quick Settings.
- Tap the Wi-Fi icon to turn it off.
- Make sure Mobile Data is turned on (look for 4G/5G/LTE in your status bar).
- Wait 30 seconds. Your voicemails should populate.
Fix #2: Clear the Phone App Cache
- Go to Settings → Apps (may be called “App Management” on some phones).
- Scroll down and tap Phone (or search for “Phone” using the search icon).
- Tap Storage & cache (or just “Storage”).
- Tap Clear cache (not Clear storage—that will erase your call history).
Fix #3: Force Stop and Restart the Phone App
- Go to Settings → Apps → Phone.
- Tap Force Stop.
- Tap OK to confirm.
- Open the Phone app again and check the Voicemail tab.
Fix #4: Toggle Visual Voicemail Off and On Again
- Open the Phone app → three dots → Settings → Voicemail.
- Toggle Visual Voicemail to OFF.
- Wait 10 seconds.
- Toggle Visual Voicemail back to ON.
- Wait 30 seconds for messages to reappear.
Fix #5: Check “Allowed Networks for Apps” (Samsung Only)
- Go to Settings → Connections.
- Tap Data Usage.
- Scroll down and tap Allowed networks for apps (may be called “Allow network for apps”).
- Scroll down to Visual Voicemail and tap it.
- Select Mobile data preferred or Prefer mobile network only.
Fix #6: Update or Reinstall Carrier Visual Voicemail App
- Open the Google Play Store.
- Search for your carrier’s visual voicemail app (e.g., “AT&T Visual Voicemail”).
- If Update appears, tap it.
- If only Open or Uninstall appears, uninstall and reinstall the app.
Fix #7: Contact Your Carrier for Reprovisioning
If none of the above worked, the problem is on your carrier’s side. Visual voicemail is tied to a feature on your account called a VVM profile (Visual Voicemail profile). Sometimes this profile becomes corrupted or disabled during plan changes or phone upgrades.
Choose basic voicemail if: You rarely get voicemails, you prefer calling in, or you’re on a prepaid plan that doesn’t include visual voicemail.
Choose visual voicemail if: You get multiple voicemails daily, you want to read transcriptions instead of listening, or you need to quickly triage which messages to respond to first.
Frequently Asked Questions
How do I set up visual voicemail for the first time?
Open your Phone app, tap the three dots in the corner, go to Settings > Voicemail, and toggle on Visual Voicemail—then follow the prompts to create a PIN and record a greeting.
Does visual voicemail work internationally?
Visual voicemail only syncs when connected to your home carrier’s network. While roaming internationally, you’ll need to use basic voicemail by calling your voicemail number directly.
Data roaming charges may apply if visual voicemail attempts to sync so consider turning it off before traveling.
Will visual voicemail work if I switch carriers?
Yes, but you’ll need to set it up again. When you switch carriers, your old visual voicemail settings remain on your phone but won’t work with the new carrier. Go to Settings → Apps → Phone → Clear cache (Fix #2 above), then follow the setup steps for your new carrier.
Why did my visual voicemail stop working after a software update?
Software updates sometimes reset app permissions or change default settings. This is especially common on Samsung phones after One UI updates. Try Fix #5 (Allowed networks for apps) first—this solves the majority of post-update issues on Samsung devices.
Can I use visual voicemail on a Google Pixel without a carrier plan?
No. Visual voicemail requires an active carrier connection to sync messages. Wi-Fi-only Pixels cannot receive or display voicemails of any kind.
How much data does visual voicemail use?
Very little. Each voicemail is typically 100-300 KB for the audio file. Transcriptions add negligible data (a few KB of text). The average user consumes less than 50 MB per month from visual voicemail.
Why can’t I find the Visual Voicemail toggle in my settings?
Your carrier either doesn’t support visual voicemail on your current plan, or your phone is running an older version of Android (pre-6.0) that lacks the feature.
What if my carrier isn’t listed (Mint, Google Fi, Cricket)?
Google Fi includes visual voicemail in the Phone app automatically, Cricket requires their separate app from the Play Store, and Mint Mobile does not offer visual voicemail at all (use basic voicemail instead).
Does visual voicemail work on Wi-Fi or need mobile data?
Visual voicemail requires a mobile data connection (4G/5G/LTE) to sync messages—turning off Wi-Fi often fixes the problem because many phones try and fail to sync over Wi-Fi only.
Final Words
Setting up visual voicemail on Android shouldn’t require a support ticket. In most cases, it’s a simple toggle in your Phone app settings. But when it doesn’t work, the fix is almost always one of the seven troubleshooting steps above, with the Wi-Fi toggle and data settings fix solving 80% of cases.
Image source: https://www.androidauthority.com/how-to-set-up-voicemail-on-android-1173574/