
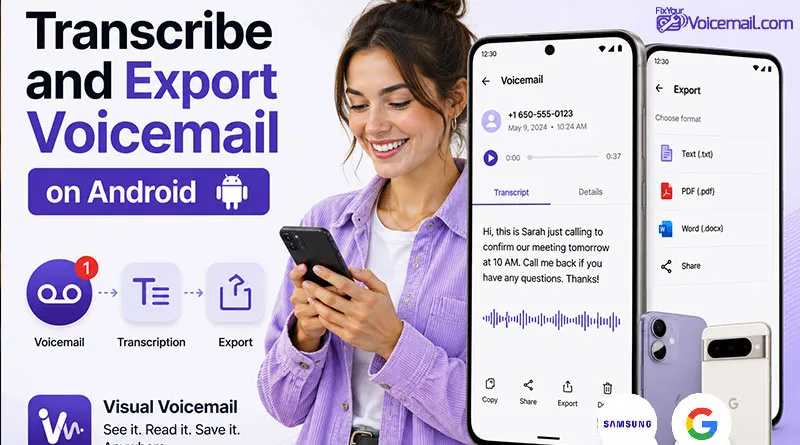
Most people think voicemail transcription happens automatically or not at all. You either have the feature built into your phone, or you don’t. But there’s a third option that almost no one talks about: manual voicemail transcription.
And in many situations, it’s actually better than the automatic kind. This guide explains all the methods to transcribe a voicemail using the manual method so that you can export a voicemail to an audio file and transcribe it to text files manually using DIY and AI methods. Before you proceed, make sure you know the basics of voicemail setup on Android.
Transcribe and Export Voicemial: Keynotes
- Export voicemail audio
- Google Phone app → Save → Downloads
- Samsung Visual VM → Save as
- Google Voice → Download audio
- No export option? → Screen recorder (internal audio) or call-and-record
- Convert if needed (optional)
- .amr or .3gp files work directly with most transcription services
- Transcribe the audio
- Short & simple → DIY (type yourself)
- Pixel owner → Google Recorder (free, 85–95%)
- Any Android, decent accuracy → Live Transcribe (free, 80–90%)
- Technical or fast → Rev AI ($0.25/min, 95–99%)
- Critical or poor audio → Rev Human ($1.50/min, 99%+)
- Use the transcript
- Copy/paste into notes, email, or document
- Search saved transcripts by keyword
- Delete audio and transcript after use (if sensitive)
What is Manual Voicemail Transcription on Android?
Manual voicemail transcription is the process of converting a voicemail audio file into written text by a human (either you or a professional transcriptionist) and not by automated speech recognition software.
In other words:
- Automatic transcription: A computer listens to your voicemail and guesses what was said.
- Manual transcription: An actual person listens to your voicemail and types exactly what they hear.
That “person” can be:
- You (DIY Method): you listen and type yourself)
- A freelance transcriptionist (hired via Rev, GoTranscript, etc.)
- A professional service (legal or medical transcriptionists for sensitive content)
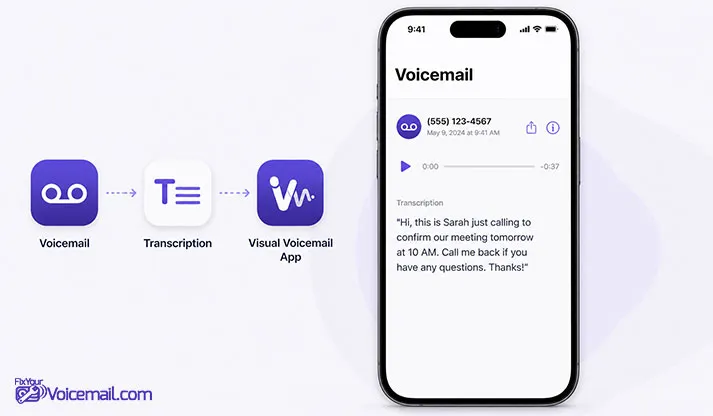
How Manual Transcription Works
Manual transcription follows a simple four‑step workflow. You don’t need special software, just a voicemail file and something to type with.
Step 1: Get the Voicemail Audio File
You need the voicemail as a playable audio file on your computer or phone.
How to export a voicemail from Android:
- Google Phone app (Pixel) → Tap and hold voicemail → Save → Downloads folder
- Samsung Visual Voicemail → Tap and hold → Save as audio
- Google Voice → Three dots → Download audio
- No export option? → Use screen recorder with internal audio (Android 12+) or the call‑and‑record method
(For complete step‑by‑step export instructions with screenshots, see the detailed guide: “How to Manually Transcribe a Voicemail by Exporting the Audio File” above.)
Step 2: Choose Your Transcription Method
- DIY method → No one else ever hears your voicemail
- Freelance human → You choose the service, and you can delete the audio immediately after
- Professional service → They sign confidentiality agreements
Step 3: Transcribe (If Doing It Yourself)
- Play the voicemail on your computer or a second device.
- Open a text editor (Google Docs, Notepad, Microsoft Word).
- Listen to 5–10 seconds → Pause → Type what you heard.
- Repeat until the entire voicemail is transcribed.
- Play the whole voicemail again while reading your transcript to catch mistakes.
Step 4: Save and Use the Transcript
- Save as a
.txtor.docxfile - Copy/paste into email, notes, or a CRM system
- Search it later by keyword
- Share with colleagues or family (without sharing the audio)
Read also: How to Get Rid of Voicemail Notification? Simple Tips
Why Should You Use Manual Voicemail Transcription?
Most Android users never consider manual transcription because they don’t know it exists. Here’s why you should add it to your toolkit.
Reason 1: Perfect Accuracy for Critical Voicemails
Automatic transcription makes mistakes. Sometimes small ones (calling “Mike” instead of “Mark”). Sometimes big ones (mishearing “not” as “now” apparently completely changing meaning).
Real example from a user review:
A customer received a voicemail: “Your delivery will arrive on Thursday, NOT Tuesday.”
Automatic transcription output: “Your delivery will arrive on Thursday NOW Tuesday.”
The customer rushed to prepare for Tuesday. The delivery came Thursday. A costly error.
Manual transcription doesn’t make that mistake. A human hears the difference between “not” and “now” every time.
Reason 2: Manual Work When Automatic Isn’t Available
Automatic voicemail transcription isn’t universal:
- Prepaid plans almost never include it
- T‑Mobile charges extra ($4/month) for a feature that many users report doesn’t work
- Regional carriers often don’t support it at all
- International users frequently have no access
Manual transcription works for everyone. If you can play a voicemail, you can transcribe it manually.
Reason 3: You Get Context, Not Just Words
Automatic transcription transcribes words. Humans transcribe meaning.
Listen to: “I need the Johnson file, no, wait, the Jackson file, by three o’clock.”
- Automatic: I need the johnson file no wait the jackson file by three oclock
- Manual: “I need the Johnson file, no, wait, the Jackson file, by three o’clock.”
The manual version shows the speaker correcting themselves. That context matters. It tells you they almost made a mistake but caught it.
Reason 4: Manual Transcription Is Completely Private
When you use automatic transcription (Google Voice, carrier apps, third‑party apps), your voicemail audio is uploaded to someone’s servers. It’s processed in the cloud. You don’t control who hears it or how long it’s stored.
Can You Actually Export Voicemails from Android?
Most modern Android voicemail systems save voicemails as standard audio files (usually .amr, .3gp, or .m4a format). These files are stored locally on your phone or in the cloud. The challenge is finding the “export” or “save” button but many apps hide it.
Here’s what works across different Android setups:
| Voicemail App / Phone | Can Export Directly? | File Format |
|---|---|---|
| Google Phone (Pixel, Motorola, Nokia) | Yes | .amr or .m4a |
| Samsung Visual Voicemail | Yes(most versions) | .amr or .3gp |
| AT&T Visual Voicemail | Yes | .amr |
| T-Mobile Visual Voicemail | Sometimes (varies by update) | .amr |
| Verizon Visual Voicemail | No direct export | N/A |
| Google Voice | Yes(download from web) | .mp3 or .m4a |
| Third-party apps (Voxist, YouMail) | Yes | .mp3 or .m4a |
Method 1: Export from Google Phone App (Pixel & Stock Android)
This works on Google Pixels, Motorola phones, Nokia devices, and any Android phone using the Google Phone app (not the manufacturer’s custom dialer).
Step-by-Step Instructions
- Open the Phone app (blue icon with white handset).
- Tap the Voicemail tab at the bottom right of the screen.
- Find the voicemail you want to export.
- Press and hold on the voicemail entry until a menu appears.
- On some versions, tap the three-dot menu (⋮) next to the voicemail instead.
- Tap “Save” or “Export” from the menu.
- On older Pixels: Tap “Save to phone” or “Save to Drive.”
- On newer Pixels (Android 14+): Tap “Export” → choose “Save to device” or “Save to Google Drive.”
- Choose a destination:
- Internal storage → The file saves to
Downloads/Voicemails/orMusic/Voicemails/ - Google Drive → Accessible from any device
- Third-party cloud (Dropbox, OneDrive) if available
- Internal storage → The file saves to
- The file saves with a name like:
Voicemail_from_5551234567_20260215_143022.amr
What If You Don’t See “Save” or “Export”?
Try this alternative: Tap the voicemail to open it, then look for a share icon (square with an arrow). Tap it → Save to Drive or Save to device. On some Google Phone versions, sharing saves the audio file instead of just the transcript.
Where to Find the Saved File
- File Manager app → Internal Storage → Downloads → Look for a Voicemails folder
- File Manager → Internal Storage → Music → Voicemails
- Google Drive (if you saved there) → Look for a folder named Voicemails or Phone exports
Method 2: Export from Samsung Visual Voicemail
Samsung’s Visual Voicemail app varies by One UI version and carrier. Here’s the universal method.
Step-by-Step Instructions
- Open the Phone app → Tap the Keypad tab.
- Tap the Visual Voicemail icon (usually a small tape reel or voicemail bubble in the bottom right corner).
- Tap and hold the voicemail you want to export.
- A popup menu appears.
- Tap “Save as” or “Save to device.”
- On some Samsung versions: Tap the three-dot menu (⋮) → Save audio.
- Choose a location (Internal storage or SD card).
- The default save location is usually
Internal Storage/Voicemail/
- The default save location is usually
- Confirm the save. The file saves with a timestamp and caller ID in the name.
Troubleshooting Samsung Exports
Problem: “Save as” or “Save audio” is grayed out or missing.
Solution 1: Update the Visual Voicemail app. Go to Galaxy Store → Menu → Updates.
Solution 2: Your carrier’s Samsung version may have disabled export. Switch to Google Voice (Method 4) for future voicemails.
Solution 3: Use the “Call and Record” workaround (Method 5 below).
Method 3: Export from Carrier Visual Voicemail Apps
Carrier apps are inconsistent. Here’s what works for the major US carriers.
AT&T Visual Voicemail
- Open the AT&T Visual Voicemail app.
- Tap the voicemail you want.
- Tap the three-dot menu (⋮) in the top right corner.
- Tap “Save audio” or “Export.”
- Choose “Save to device” or share via Google Drive/Email.
File location: Internal Storage/ATTVoicemail/ or your default Downloads folder.
Verizon Visual Voicemail
Important: Verizon’s stock Visual Voicemail (integrated into the Phone app on most devices) does NOT allow direct audio export. There is no “Save” or “Export” button.
Workarounds:
- Use Google Voice (Method 4) instead
- Use the “Call and Record” method (Method 5)
- Switch to the Verizon Messages+ app (some versions allow export)
T-Mobile Visual Voicemail
- Open the T-Mobile Visual Voicemail app.
- Tap and hold the voicemail.
- Tap “Save” or “Share.”
- If “Share” appears, tap it → Choose “Save to Drive” or “Send via email” (which attaches the audio file).
Note: T-Mobile has removed the direct export option on recent app updates. If “Save” is missing, use the Share workaround above.
Method 4: Export from Google Voice
Google Voice makes exporting voicemail audio incredibly easy, and it works on any Android phone.
Step-by-Step Instructions
On your Android phone:
- Open the Google Voice app.
- Tap the Voicemail tab (or look under Inbox for voicemail messages).
- Tap the voicemail you want.
- Tap the three-dot menu (⋮) in the top right.
- Tap “Download audio.”
- The file saves to your
Downloadsfolder as an.mp3or.m4afile.
From a computer (best for multiple exports):
- Go to voice.google.com and sign in.
- Click Voicemail in the left sidebar.
- Click the voicemail you want.
- Click the three-dot menu (⋮) → Download.
- The audio file saves to your computer’s Downloads folder.
Pro tip: Google Voice exports are higher quality (MP3) than most carrier exports (AMR). Use Google Voice as your primary voicemail system if you frequently need exports.
Method 5: The “Call and Record” Workaround (When Nothing Else Works)
If your voicemail app has no export option, and you’ve tried the methods above then use this 100% reliable workaround. It works with any carrier, any phone, any voicemail system.
What You’ll Need
- A second recording device (another phone, a computer with a microphone, or an audio recorder)
- A quiet room
- Speakerphone or earpiece (your choice)
Step-by-Step Instructions
- Prepare your recording device:
- Open a voice recording app on a second phone, or
- Open Audacity (free) or Voice Recorder on a computer.
- Call your voicemail from your Android phone:
- Dial your own phone number or use the voicemail shortcut (
*86on most carriers,*98on T-Mobile,*123on Verizon).
- Dial your own phone number or use the voicemail shortcut (
- Enter your voicemail PIN when prompted.
- Navigate to the voicemail you want. Listen to the entire message.
- On your recording device, press RECORD.
- Play the voicemail again on speakerphone (or hold the earpiece close to the recording device’s microphone).
- After the message ends, stop recording.
- Save the recording as an
.mp3or.m4afile.
Quality Tips for Call-and-Record
| Setting | Best Practice |
|---|---|
| Speakerphone vs. earpiece | Speakerphone is easier but picks up room echo. Earpiece held directly against the recording mic gives cleaner audio. |
| Room | Carpet, curtains, and soft furniture reduce echo. Bathrooms and kitchens sound terrible. |
| Distance | 2–4 inches between phone speaker and recording mic. Too close = distortion. Too far = background noise. |
| Test first | Record a test phrase (“The quick brown fox jumps over the lazy dog”) and play it back before recording the real voicemail. |
The “Native Screen Recorder” Hack (Android 12+)
On Android 12 and newer, you can use the built-in Screen Recorder to capture both screen and internal audio, without needing a second device.
- Swipe down twice to open Quick Settings.
- Tap Screen Recorder (if not visible, tap the pencil icon to add it).
- Before recording, tap “Record audio” → choose “Device audio” (not “Microphone”).
- Open your voicemail app and start playing the voicemail.
- Tap Start recording on the Screen Recorder overlay.
- Let the voicemail play completely.
- Stop recording. The video (with perfect internal audio) saves to your
Downloads/Screen recordings/folder. - Use a free audio extractor app (like Video to MP3 Converter) to pull just the audio.
Limitation: Device audio recording is disabled by some carriers and manufacturers (notably Samsung on certain builds). Test with a short video first.
How to Transcribe the Exported Audio File
You now have an audio file (.amr, .3gp, .m4a, or .mp3). Here’s how to turn it into text.
Option A: Free DIY Transcription (Your Own Ears)
Best for: Short voicemails (under 60 seconds), simple content, zero budget.
- Play the audio file on your computer or phone.
- Open Google Docs, Notepad, or any text editor.
- Listen to 5–10 seconds, pause, type what you heard.
- Repeat until the voicemail is fully transcribed.
- Play the entire voicemail again while reading your transcript to catch errors.
Time required: Approximately 3–5 minutes per minute of audio (faster with practice).
Option B: Free AI Transcription (Android Apps)
| App | Free Limit | Accuracy |
|---|---|---|
| Google Recorder (Pixel only) | Unlimited | Very good (85–95%) |
| Otter.ai | 300 minutes/month | Good (80–90%) |
| Live Transcribe (all Android) | Unlimited | Good (80–90%) |
| Speechnotes | Unlimited (ads) | Fair (70–85%) |
Using Google Recorder (Pixel 6+):
- Open the Recorder app.
- Tap the + icon → Import audio.
- Select your exported voicemail file.
- The app automatically transcribes it and syncs the text with the audio waveform.
- Tap the three dots → Export → Save as text or Copy to Google Docs.
Using Live Transcribe (any Android):
- Open Live Transcribe (download from Play Store if not preinstalled).
- Play the voicemail audio file on your computer or second device.
- Hold your phone’s microphone near the speaker.
- Live Transcribe writes the text in real time.
- Tap the three dots → Save transcript.
Pro Tips for Clean Audio Exports
Before Exporting
- Listen to the voicemail first to identify any sensitive content you might want to delete later.
- Check the file size, unusually small files may be corrupted or empty.
- Rename the file immediately after export. Default names like
audio_0001.amrbecome useless when you have 50 voicemails.
After Exporting
- Back up important voicemail exports to Google Drive, Dropbox, or an external hard drive. Voicemails can disappear from your phone after carrier migration or account changes.
- Delete sensitive exports after transcription if privacy is a concern.
- Convert
.amrto.mp3for better compatibility with transcription services. Use a free converter like Online Audio Converter or the Media Converter app on Android.
Quality Checklist for Transcription
Before sending a voicemail to a paid transcription service, listen to the first 10 seconds. If you can answer “yes” to all three questions, the service will handle it fine:
- Can I understand every word without straining?
- Is there no overlapping speech (two people talking at once)?
- Is background noise minimal (no loud music, wind, or traffic)?
If you answered “no” to any: Use a human transcription service (Rev Human, GoTranscript). AI will struggle and waste your money.
Frequently Asked Questions
Can I export voicemails in bulk from Android?
No, not natively. Each voicemail must be exported individually. Google Voice allows bulk download from the web interface (voice.google.com → Settings → Download all data). For carrier apps, you need one-by-one export.
Will exporting a voicemail delete it from my phone?
No. Exporting creates a copy. The original remains in your voicemail inbox until you delete it manually.
What file format are exported voicemails?
Usually .amr (Adaptive Multi-Rate) or .3gp from carriers. Google Voice exports .mp3 or .m4a. All major transcription services accept .amr files, no conversion needed.
How long are exported voicemails stored in Google Voice?
Google Voice retains voicemails indefinitely unless you delete them. Old voicemails (years old) remain downloadable. Carrier apps may delete voicemails after 14–30 days, depending on your plan.
Can I export a voicemail that I already listened to and deleted?
No, once deleted, the audio is gone (unless you previously exported it). Deleted voicemails cannot be recovered from most carriers. Google Voice keeps deleted voicemails in Trash for 30 days.
Is it legal to record and transcribe my own voicemails?
Yes. Voicemails left for you are considered messages directed to you. You own the recording. The “call and record” workaround is legal in all US states when recording your own voicemail playback. For business voicemail systems, consult your employer’s policy.
What’s the fastest way to transcribe a 3‑minute voicemail right now?
Use Google Recorder (Pixel only) → Import audio → Instant transcript.
No Pixel? Use Live Transcribe while playing the audio from a computer.
Need 99%+ accuracy? Rev AI ($0.75 for 3 minutes), transcript in 5 minutes.
Bottom line:
Manual voicemail transcription is your ultimate fallback. It works when everything else fails. Yes, it takes an extra 5–10 minutes. But for critical voicemails, the ones that contain contract details, medical instructions, or life‑changing information, those minutes are worth it.
Other Related Articles: