

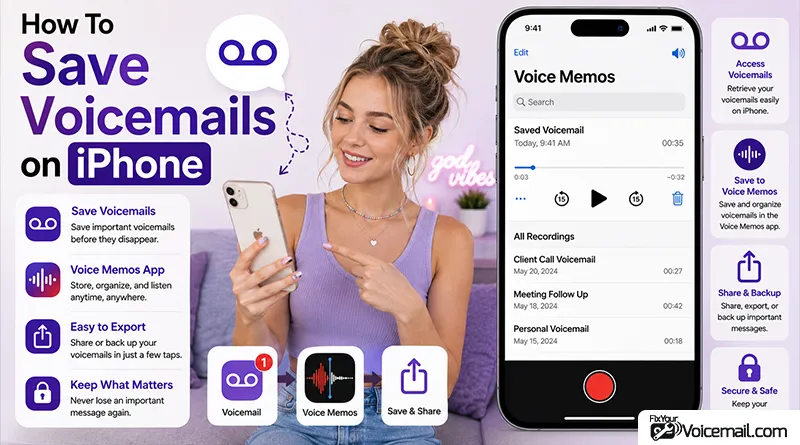
That voicemail from a loved one or an important business contact could disappear at any moment.
Most carriers automatically delete voicemails from their servers after 30 to 60 days, and switching to a new phone or SIM card can also wipe your messages without warning.
This guide covers all five methods to save voicemails on iPhone, including newer features like Live Voicemail and iCloud sync.
Many iPhone users think they know how to save a voicemail, but the truth is there’s a lot more to it than just tapping a button.
This isn’t just about saving a file; it’s about archiving memories and ensuring you never have to say, “I wish I had saved that voicemail.”
The guide not only tells users how to save a voicemail on iOS but also how to never lose one in the first place by setting up automation and understanding carrier policies, including changing phone/SIM card or network changes.
Method 1: Save a Single Voicemail on iPhone Using the Share Icon.
The quickest way to save a voicemail is using the built-in share icon directly from the Phone app.
Step-by-Step Instructions
- Open the Phone app: Tap the green phone icon on your home screen.
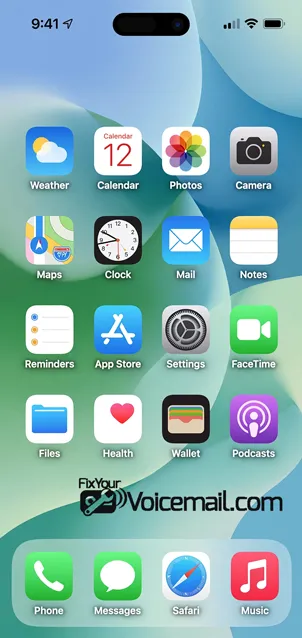
- Tap Voicemail: Select the Voicemail tab at the bottom right corner.
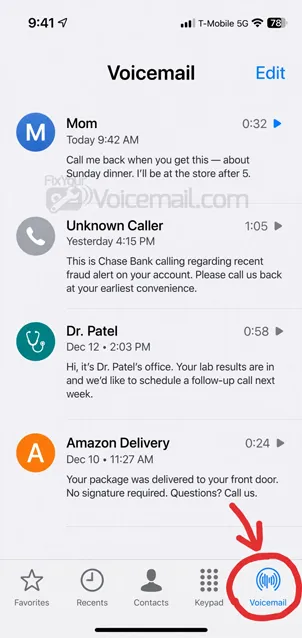
- Select the voicemail: Tap the voicemail message you want to save.
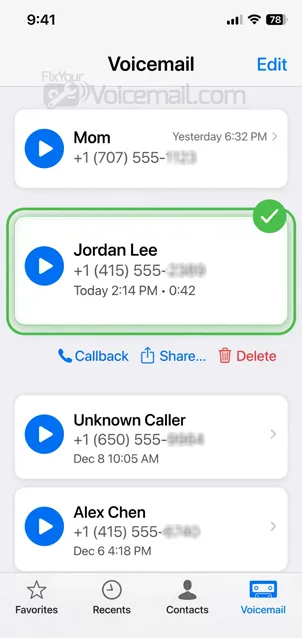
- Tap the Share icon: Look for the square with an arrow pointing upward, located in the upper right corner of the screen.
- Choose a save destination: Select from options like Save to Files, Mail, Messages, AirDrop, or Notes.
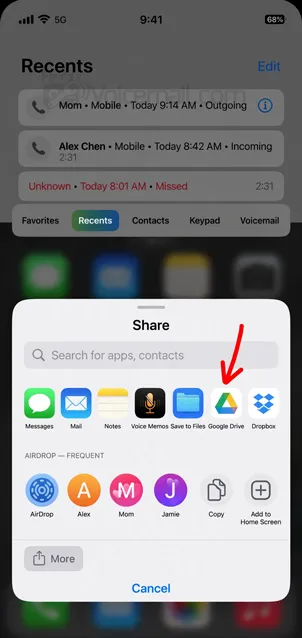
Where to Save Your Voicemail?
The share menu displays two groups of options;
- Recently used: Your most frequently used storage options.
- Locations: Available storage on your iPhone, including iCloud Drive, Google Drive, and Dropbox.
You can save your iPhone voicemails to the Files app (for local or iCloud Drive storage), to Voice Memos (great for listening and easy sharing), or via Mail and Messages to send them to others or to yourself for backup.
What if the share button is missing?
If you don’t see the share icon, ensure Visual Voicemail is set up and your carrier supports it. Try force-quitting the Phone app or restarting your iPhone.
Method 2: Save iPhone Voicemail to Voice Memos or Notes.
Apple recommends saving voicemail messages using Notes or Voice Memos. Voice Memos is particularly useful because it’s an audio app designed for recordings.
Saving Voicemails to Voice Memos
- Follow the share method steps above.
- When the share menu appears, swipe until you see the Voice Memos icon.
- Tap Voice Memos to save the recording.
- The voicemail appears as a new recording in your Voice Memos app.
Voice Memos is Apple’s built-in audio recording app. Saving a voicemail to Voice Memos is a smart choice because if you have iCloud sync enabled for Voice Memos, the file will automatically be backed up and also sync across all your devices.
Pro Tip: If your Voice Memos sync to iCloud, a copy of your voicemail is automatically stored in the cloud, accessible from any Apple device.
Read Also: How to Check iPhone Voicemail from Another Phone?
Saving to Notes
- Follow the share method steps above.
- Select Notes from the share menu.
- Choose an existing note or create a new one.
- Tap Save to store the audio file in your note.
Save via Mail or Messages
Sending a voicemail to yourself via email is a classic and reliable backup method. It ensures you have a copy in your email server, which is often practically permanent.
Sending it via Messages is useful if you need to share the voicemail with someone else immediately.
Method 3: Save iPhone Voicemail to Cloud Storage.
Cloud storage offers a secure, accessible way to preserve voicemails.
Using iCloud Drive
- Follow the share method steps above.
- Select Save to Files from the share menu.
- Navigate to iCloud Drive.
- Choose a folder and tap Save.
Using Google Drive or Dropbox
- Make sure your third-party cloud app is installed.
- Follow the share method steps.
- Select your cloud app from the share menu.
- Choose the destination folder and follow the prompts to save.
Cloud storage protects your voicemails in case of phone or computer hardware failure.
Method 4: Save Live Voicemail Transcriptions
iOS 17 introduced Live Voicemail, which displays real-time transcriptions as callers leave messages. While the transcriptions and audio are saved to your Phone app, here’s how to preserve them permanently.
Enabling Live Voicemail
- Open Settings > Apps > Phone.
- Tap Live Voicemail.
- Toggle it on.
Saving Live Voicemail Audio and Transcripts
Once Live Voicemail is active:
- Open the Phone app and go to Voicemail.
- Select the Live Voicemail message.
- Tap the Share icon.
- Save using any method listed above (Voice Memos, Files, or cloud storage).
Note: Live Voicemail may not be available in all countries, regions, or languages. Calling and data rates may apply.
How to Enable iCloud Voicemail Sync
Apple allows you to store and sync voicemail through iCloud, but many users don’t realize this feature exists.
Steps to Enable iCloud Sync
- Open Settings > Your Name > iCloud.
- Tap “Show All” next to “Saved to iCloud.”
- Turn on Phone & FaceTime.
With this enabled, your voicemails, Live Voicemail, and carrier voicemail sync across your Apple devices.
Method 5: Transfer iPhone Voicemail to Computer and save it(Permanent).
For permanent, long-term storage, transferring iPhone voicemails to a computer is the most reliable option.
How to Save to a Mac
- On your iPhone: Save the voicemail to iCloud Drive in the Files app.
- On your Mac: Open the Finder and go to iCloud Drive. The voicemail
.m4afile will be there, ready to download or move to your Mac’s local storage.
How to Save to a PC
- On your iPhone: Save the voicemail to a cloud service that you have on your PC, like Dropbox or Google Drive.
- On your PC: Open the respective cloud app or website, download the
.m4afile, and save it to your local hard drive or external drive.
Option A: Using the Share Method to Computer
- Set up AirDrop on both your iPhone and Mac.
- Follow the share method steps.
- Select AirDrop from the share menu.
- Tap your computer’s name.
- Accept the AirDrop and save the file on your computer.
Option B: Using Third-Party Software
Dedicated tools like EaseUS MobiMover or iMazing offer streamlined transfer(not sponsored).
- Install the software on your computer.
- Connect your iPhone via USB cable and tap “Trust” when prompted.
- Select “Voice Mails” for export.
- Choose your storage path.
- Click Transfer to save all voicemails to your computer.
Important: These tools can transfer multiple voicemails at once, making them efficient for bulk saving.
These were the 5 easy and most popular methods to save or transfer iPhone voicemails. Now let’s dig into the most common question you might have regarding this.
1.How to Save a Voicemail Before It’s Automatically Deleted by Your Carrier
This is perhaps the most critical piece of information in this guide. Many people don’t realize that voicemails are not permanent; carriers have limits.
Most carriers will automatically delete old voicemails after 14 to 30 days to free up space on their servers.
To ensure a voicemail is not lost, you must save it to a permanent location using the Share button immediately after listening to it.
Do not rely on your carrier’s inbox as a long-term storage solution.
According to carrier policies, most US carriers allow you to store a maximum of about 40 messages in your visual voicemail inbox, and each message can be a maximum of 3 minutes long.
When your inbox is full, or after the expiration period, your carrier will automatically delete the oldest messages first.
Don’t let a precious message be a victim of this automated system.
The Proactive Strategy:
Set a weekly reminder to check your voicemail, save the important ones, and delete the rest to keep your inbox tidy and prevent any important messages from being pushed out by new ones.
Can You Save a Voicemail After I’ve Already Deleted It?
This is a heart-sinking moment: you deleted a voicemail, and now you desperately need it back. What are your options?
In most cases, once a voicemail is deleted from your iPhone, it is gone for good.
However, if you have an iCloud backup that was created before you deleted the message, you might be able to restore that entire backup to your iPhone to retrieve it.
This is a drastic measure, as it will revert your phone to an earlier state.
Can You Recover a Permanently Deleted Voicemail?
Here is a realistic look at your options:
- Check the “Deleted Messages” Folder: Unlike some other apps, the iPhone Phone app does not have a “Recently Deleted” folder for voicemails. Once you tap “Delete,” it’s often erased from the device immediately.
- Restore from iCloud Backup: This is your only potential recovery path. If you have an iCloud backup that dates back to before you deleted the voicemail, you can erase your iPhone and restore it from that backup.
- Third-Party Data Recovery Tools: Some software claims it can scan your iPhone’s memory for deleted data, but success rates for voicemails are generally low. While apps like CopyTrans can extract data from an existing backup y cannot recover data that has been deleted from the live device.
The lesson here is clear: Act proactively. It is far easier to save a voicemail than it is to try and resurrect one.
Troubleshooting: Why Can’t I Save a Voicemail?
It can be frustrating when you try to save a voicemail, and the Share button doesn’t work.
The Share button for a voicemail will be unavailable if your carrier does not support the feature for that specific message, or if the audio file is corrupted.
A reliable workaround is to use the iPhone’s Screen Recording feature to record the audio while playing the voicemail.
Here is what to check if you’re stuck:
- Carrier Restrictions: Sometimes, carriers disable sharing for specific voicemails, often for technical reasons. This is rare but does happen.
- Visual Voicemail is Not Set Up: The “Share” feature is a part of Visual Voicemail. If you haven’t set up Visual Voicemail (by calling your voicemail for the first time), you won’t see the Share icon.
- The Voicemail is Corrupted: If a voicemail file is corrupted, the Share option might not appear.
- Software Glitch: A temporary iOS bug can sometimes cause the share sheet to hang. A simple restart of your iPhone often fixes this.
Screen Recording to Save a Voicemail on iPhone: When Noting Works.
- Add Screen Recording to Control Center: Go to Settings > Control Center, and add Screen Recording.
- Start Recording: Open Control Center and press and hold the Screen Recording button to ensure Microphone Audio is OFF (if it’s on, it will try to record from the room, not the device’s audio).
- Play the Voicemail: Open your Phone app and play the voicemail. The screen recording will capture the audio.
- Stop and Save: Tap the red status bar at the top of the screen to stop the recording. It will be saved to your Photos app.
You can then convert the video to an audio file using apps like GarageBand or extract it on your computer.
READ ALSO:
How to Save Voicemails on iPhone-FAQ
How do I save a voicemail on my iPhone?
Open the Phone app, tap Voicemail, choose the message, and tap the Share button (a square with an up arrow). Then, choose where to save it, such as Files, Voice Memos, or Mail.
Where are voicemails saved on an iPhone?
The voicemail itself is stored on your carrier’s server until you save it. When you use the Share button, you’re saving a copy of the .m4a audio file to the location you choose on your iPhone or iCloud.
Why can’t I save a voicemail on my iPhone?
The Share button may be greyed out due to carrier restrictions, if Visual Voicemail isn’t set up, or if the file is corrupted. Try restarting your phone or using the screen recording workaround.
Do voicemails get deleted automatically on iPhone?
Yes, your carrier will eventually auto-delete older voicemails to manage server space, often after 14-30 days. Always save important ones immediately.
How do I permanently save a voicemail on my iPhone?
“Permanently” means saving it to a location you control. Use the Share button to save it to Voice Memos (which syncs with iCloud) or save it to a cloud service like Dropbox or iCloud Drive, and ensure you have a secondary backup on a computer or external drive.
Can you save a voicemail after it’s been deleted on iPhone?
Usually no. Your only chance is to restore your iPhone from an older iCloud backup that was made before you deleted the message, which is a drastic step.
How do you save a voicemail from an iPhone to a computer?
Save it to iCloud Drive or a third-party cloud app via the Share button, then download it to your computer from the cloud service’s website or app. For bulk exports, consider using a third-party tool like iMazing.
Does saving a voicemail take up storage space on iPhone?
Saving a voicemail to your Files app or Voice Memos will take up space on your iPhone or iCloud. However, a single .m4a voicemail file is usually only a few megabytes, so it’s not a major concern.
Conclusion
Saving a voicemail on your iPhone is a simple action, but the stakes are high. It is your safeguard against losing a precious memory or a critical piece of information.
We’ve covered the simple steps, the best practices for long-term storage, the urgent need to beat carrier auto-delete policies, and what to do when things go wrong.
Don’t wait. Take a moment now to open your Phone app, save an important voicemail, and use this guide to create a foolproof archiving system. Your future self will thank you.
External Source: