

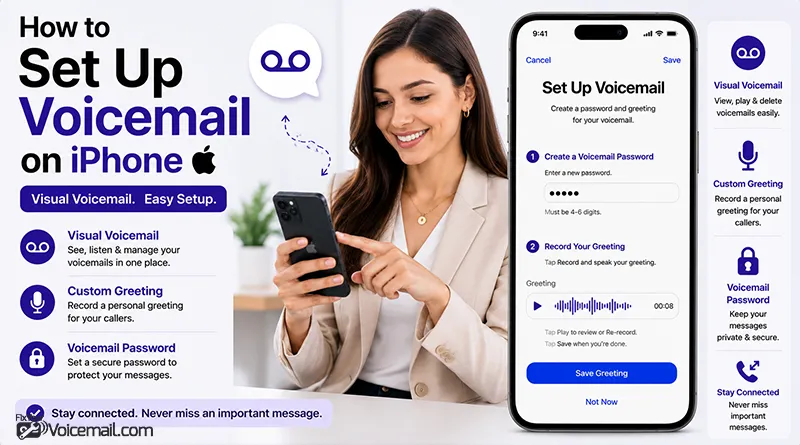
Setting up voicemail on your iPhone should be straightforward, but many users encounter frustrating obstacles: a greyed-out voicemail button, endless “Set Up Now” loops, or confusing carrier-specific requirements.
This guide covers everything you need to know, with step-by-step instructions for every carrier and every situation, plus troubleshooting for when things go wrong. Navigate to the guide Setup Voicemail on Android, if you want to see the steps for Android voicemails.
iPhone Voicemail: Quick steps
- Open the Phone app on your iPhone home screen.
- Tap the Voicemail tab at the bottom right corner.
- Tap Set Up Now if you’re setting up for the first time.
- Create a voicemail password (4 to 6 digits, up to 15 allowed).
- Choose Default greeting or tap Custom to record your own.
- Tap Save when you finish recording your custom greeting.
You’re done. Your voicemail is now active and callers can leave messages when you don’t answer.
iPhone Voicemail Setup: Before You Start
Before diving into the setup process, understand these key requirements:
- Carrier Support: Voicemail, Visual Voicemail, and Live Voicemail are available from select carriers in select countries or regions. Most plans do, but Verizon’s premium transcription costs $2.99 per month. Basic Visual Voicemail is free. Check with your carrier if they support it.
- iOS Version: The instructions in this guide work for iOS 15 through the current iOS 18. Live Voicemail requires iOS 17 or later.
- Cellular Connection: You need an active cellular data connection to set up voicemail. Wi-Fi-only setup is not supported. AT&T specifically notes that you cannot set up voicemail when using Wi-Fi calling.
How to Set Up Voicemail on iPhone: 6 Easy Steps.
Follow these detailed steps with current iPhone interface instructions:
Step 1: Open the Phone App
Open the Phone app on your home screen. It is the green icon with a white phone receiver.
Step 2: Tap the Voicemail Tab
Tap the Voicemail tab. In newer iOS layouts, it may appear at the bottom right. If using the unified inbox view, tap the filter or menu icon (three lines) and select Voicemail.
Step 3: Tap Set Up Now
If voicemail is not set up, you should see a prominent Set Up Now button. Tap it.
What if Set Up Now doesn’t appear? If you don’t see the Set Up Now option, your carrier may have already configured something on their end, or you may need to contact them directly.
Some carriers automatically provision voicemail, and you may need to call your own number to complete setup.
Step 4: Create Your Voicemail Password
Enter a secure code (typically 4 to 6 digits) and confirm it when prompted. Tap Done.
Apple will prompt you to enter a 4 to 6 digit password. You can use up to 15 digits if desired. Enter your password, then re-enter it to confirm. Tap Done twice.
Security tip: Choose a password you’ll remember but isn’t obvious (avoid 1234 or your birth year). This password protects voicemail access from other phones.
Step 5: Choose Your Greeting Option
You’ll see two options:
- Default: A standard robotic message saying you’re unavailable.
- Custom: Record your own personalized greeting.
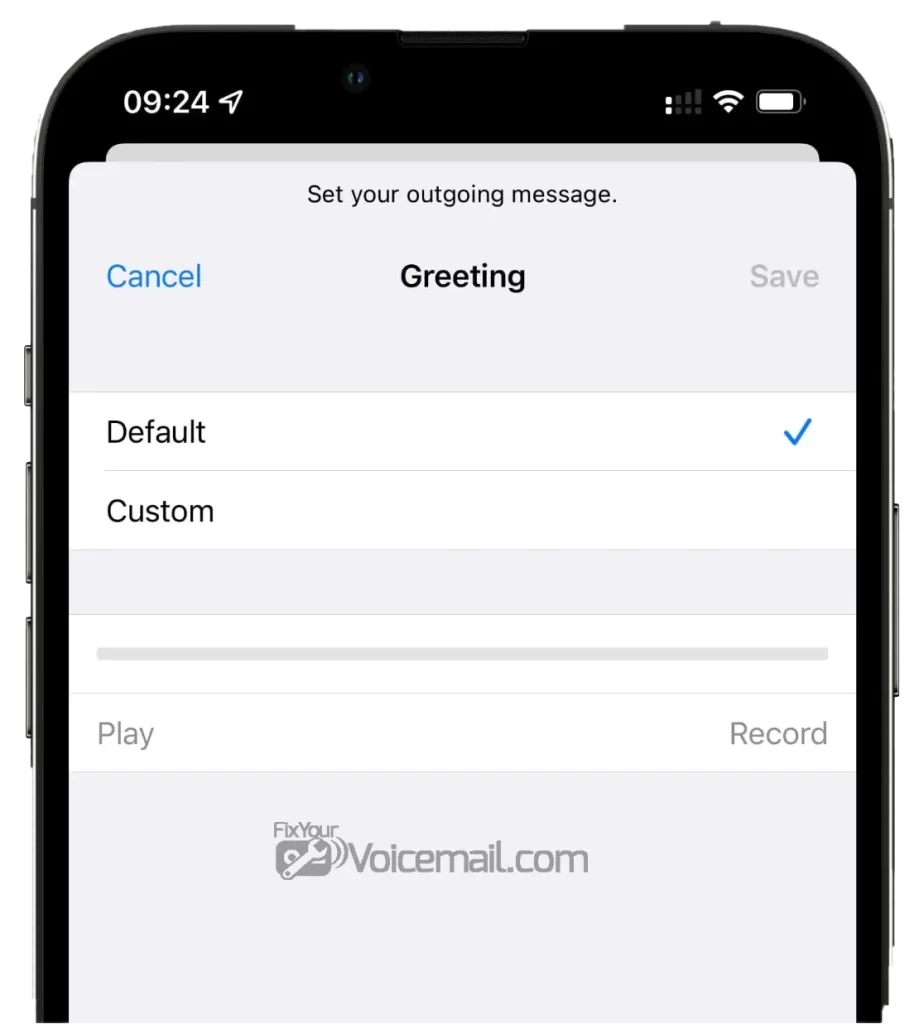
Default is pre-selected. Tap Custom to record your own message.
Step 6: Record Your Custom Greeting (If Selected)
If you chose Custom:
- Tap Record.
- Say your greeting clearly (example: Hi, this is [name]. Please leave a message)
- Tap Stop when finished.
- Tap Play to review your recording.
- Tap Save if you’re satisfied, or Record to try again.
Your voicemail is now fully set up. Callers will hear your greeting when they reach voicemail.
Customizing and Changing Your Voicemail Greeting
After initial setup, go to Phone app > Voicemail > Greeting (top corner). Switch between Default and Custom, record new messages as needed. You can update this anytime for seasonal greetings or professional messages.
iPhone Voicemails Setup: Live Visual Voicemail, Voicemail, and More
In recent iOS versions, enable Live Voicemail in Settings > Apps > Phone > Live Voicemail. This transcribes messages in real time as callers speak.
Visual Voicemail lets you see a list of messages, play selectively, delete by swiping, or share. Transcriptions (where available) provide text versions for quick reading.
Explore Settings > Phone for additional options like changing password or notification sounds.
Setting Up Visual Voicemail.
Visual Voicemail is set up automatically when you complete the standard voicemail setup process. There is no separate setup required.
Live Voicemail is a newer feature available in iOS 17 and later that shows a real-time transcription of a caller’s message as they speak . You can even pick up the call while the caller is leaving a voicemail.
Visual Voicemail Benefits
- See a list of messages with caller information.
- Play messages in any order.
- Delete messages individually without listening to all.
- Messages sync across devices via iCloud.
- Badge on the Voicemail icon shows the number of unheard messages.
Set Up Live Voicemail on iOS 18
Live Voicemail shows real-time transcription as someone leaves a message, letting you pick up mid-message. No competitor guide covers setup.
- Go to Settings > Phone > Live Voicemail.
- Turn Live Voicemail ON.
- Choose language under Siri & Search > Language for accurate transcription.
Live Voicemail Benefits
- See what caller is saying while they speak.
- Get instant text transcript.
- Decide whether to pick up call based on message.
- No need to listen to full voicemail.
Note: Verizon states messages received when Live Voicemail is active are not saved on Verizon’s system and are not available by calling *86. They stay on your iPhone only.
Dual SIM and eSIM Setup
Have personal and work lines? iOS lets you set greetings per line. Read Steps Guide To Setup and Configure Voicemail on Dual SIM iPhone if you are using eSIM or Physical SIM on your iPhone.
- Phone > Voicemail > Greeting.
- Select the line at top if Dual SIM.
- Record Custom for each number separately.
For eSIM-only iPhone 16e, setup is identical – just ensure the eSIM has an active cellular plan first. Ensure the correct line is selected in Settings > Cellular.
iPhone Voicemail Setup: Carrier-Specific Guide
While the basic setup process is the same across carriers, there are some differences to be aware of.
AT&T
AT&T requires you to set up Visual Voicemail on your own phone; you cannot set it up from another device. The setup must be completed within 60 days of activation.
May require pressing and holding 1 on the keypad. Set a 7 to 15 digit password and follow prompts.
If you are an existing customer with a voicemail password already set up, you may simply enter your existing password when prompted.
T-Mobile
T-Mobile offers multiple voicemail options: standard Voicemail, Visual Voicemail (VVM), and Voicemail to Text (VTT) . To set up, press and hold the 1 key on the device associated with your plan, or open the Visual Voicemail app.
Important T-Mobile note: If you need to reset your PIN, dial #793# to receive a temporary PIN via SMS, then create a new 4-7 digit PIN.
Verizon
Verizon’s setup follows the standard iPhone process. Open Phone, tap Voicemail, then Set Up Now. Create your password and greeting. No special steps are required beyond the standard setup.
Other Carriers
Most carriers follow the standard iPhone setup process. If you experience issues, contact your carrier’s customer service to verify your voicemail is properly provisioned on their network.
For carriers or MVNOs(Xfinity, Consumer Cellular, Ultra Mobile, etc.), Start with the Phone app. If it fails, contact support or dial your carrier’s voicemail number (often *86 or 1).
How To Use Voicemail on iPhone?
Once setup, you can use the voicemail features on your iPhone for:
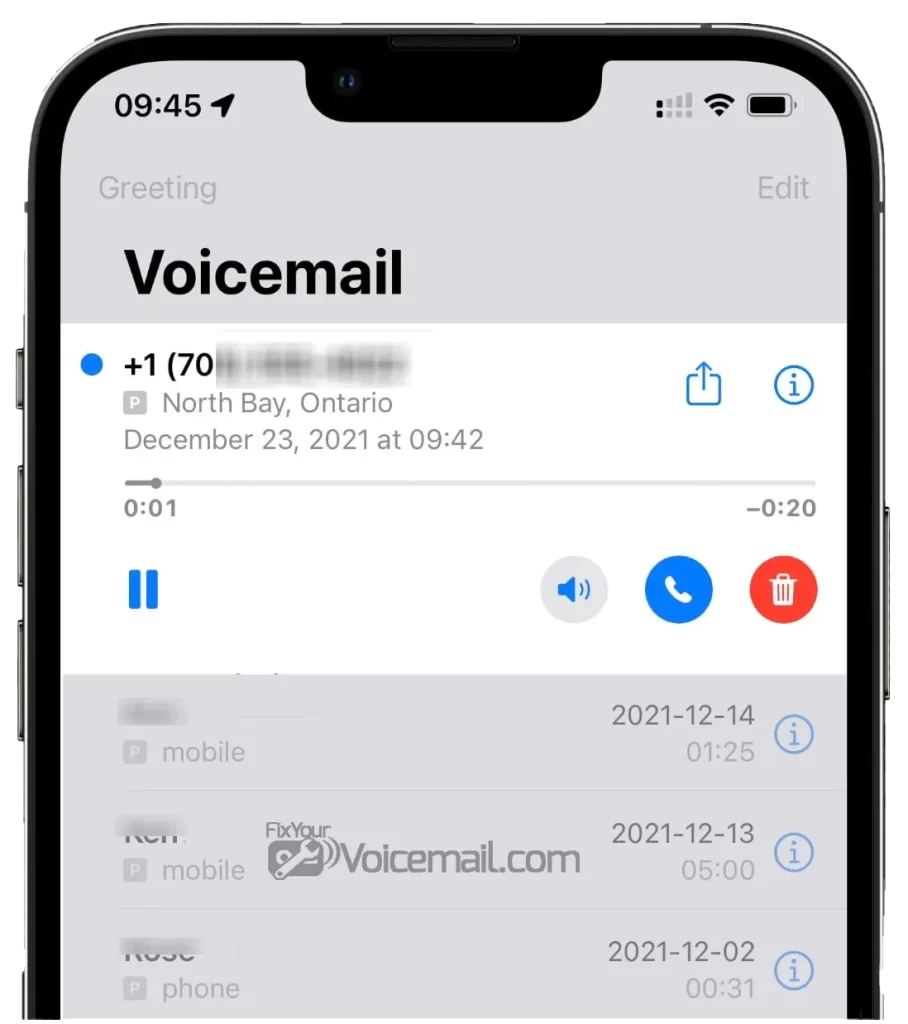
- Listen: Tap the message in Voicemail tab, it plays automatically.
- Share or save: Tap Share > Notes or Voice Memos to archive. Asurion also suggests email.
- Delete: Swipe left > Delete.
- Siri: Say “Hey Siri, play my new voicemail messages” or “play voicemail from “[name]
Read here the five easy methods to save a received voicemail on iPhone to prevent it from loosing your important voicemail messages.
For heavy users, consider third-party apps or carrier portals for additional management.
How to Save and Export Voicemails
Keep important voicemails permanently:
- Open Phone > Voicemail.
- Tap message you want to save.
- Tap Share button (top right).
- Choose Save to Files, iCloud, or share via message.
How to Access Voicemail from Another Phone
If you don’t have your iPhone, access voicemail remotely:
From Another US/Canada Phone
- Dial your iPhone number.
- Press * or # (carrier-dependent) to bypass greeting.
- Enter your voicemail password.
- Listen to messages.
From Outside US/Canada
Contact your carrier for international voicemail access instructions. In India, call your carrier’s customer support for remote access codes. For career-specific and landline instructions, follow the guide How to Check iPhone Voicemail from Another Phone.
How to Change Voicemail Greeting?
Update your greeting anytime:
- Open Phone app on your iPhone.
- Tap Voicemail tab.
- Tap Greeting in top right corner.
- Tap Play to hear the current greeting.
- To change:
- Tap Default for robotic greeting.
- Tap Custom, then Record for your voice.
- Tap Stop when finished recording.
- Tap Save to confirm.
Recording tip: Keep greetings under 15 seconds. Say your name clearly and invite callers to leave a message.
How to Change Voicemail Password Securely?
- Open Settings app.
- Tap Apps (bottom of list).
- Tap Phone.
- Tap Change Voicemail Password.
- Enter new password (4-15 digits).
- Tap Done.
iPhone Voicemail Setup: Troubleshooting Common Errors
1. “Set Up Now” missing, it just calls:
This usually means your carrier has already provisioned voicemail automatically. Simply call your own number or dial *86, then follow the automated prompts to complete setup.
If “Set Up Now” doesn’t appear, your carrier has likely already provisioned voicemail automatically on their network. Simply call your own phone number or dial *86 and follow the automated prompts to complete your voicemail setup.
2. Wi-Fi Calling error:
Wi-Fi Calling can interfere with voicemail setup because carriers require cellular network authentication. Temporarily disable Wi-Fi Calling in Settings > Phone > Wi-Fi Calling, then try setup again over cellular data.
3. Forgot password:
Call your carrier’s customer service or dial their automated password reset line (T-Mobile users dial #793#, AT&T users dial 611). They will send a temporary PIN via SMS to create a new password.
4. Visual Voicemail unavailable on Wi-Fi:
Visual Voicemail requires a cellular data connection to download message transcripts and audio files from your carrier’s server. Disable Wi-Fi and ensure Cellular Data is enabled in Settings > Cellular before accessing Visual Voicemail.
5. “No Voicemail” Message Despite Having Messages:
Visual Voicemail is not syncing properly, often due to a poor cellular data connection or carrier provisioning issues. Reset your network settings under Settings > General > Transfer or Reset iPhone > Reset > Reset Network Settings to restore the connection.
6. VPN interference:
Active VPN connections can block Visual Voicemail’s communication with your carrier’s servers, preventing messages from downloading. Disable your VPN in Settings > VPN or the VPN app, then reopen the Phone app to refresh the connection.
7. Phone Asks for a Mailbox Number:
Your carrier requires a mailbox number to route voicemail calls; this is usually your own phone number, the last four digits, or 0000. Contact your carrier’s support to confirm the correct number if the default options fail.
8. No notifications:
Notification settings may be disabled or your phone may be in Do Not Disturb mode. Go to Settings > Phone > Notifications and ensure Allow Notifications is toggled on, then check Focus modes.
9. Changed SIM:
When you change SIM cards, voicemail provisioning must reset to the new carrier’s settings. Remove and reinsert the SIM, restart your phone, then attempt setup again or contact your new carrier to provision voicemail.
10. Can’t Record Custom Greeting:
Wi-Fi can interfere with the recording process; turn off Wi-Fi and try recording over cellular data only. If that fails, delete any existing voicemail messages and attempt recording again after a soft reset.
11. Setup Process Loops or Never Completes:
Carrier provisioning is incomplete or network settings are corrupted. Force quit the Phone app, perform a soft reset, or contact your carrier to verify voicemail is active on your account.
iPhone Voicemail Setup and Faqs
How do I set up voicemail on iPhone 16?
Same steps as any iPhone. iPhone 16 supports all voicemail features with iOS 17+.
What’s the difference between Live Voicemail and regular voicemail?
Live Voicemail shows real-time transcripts as caller speaks. Regular voicemail records full message then notifies you.
Do I need cellular service?
Yes. Voicemail requires mobile connection for initial setup.
Why is my voicemail button greyed out or not working?
A greyed-out voicemail button typically indicates a carrier provisioning issue or network connectivity problem. Force quit the Phone app, perform a soft reset by holding the power and home buttons, then try again over cellular data with Wi-Fi turned off.
How do I reset my voicemail password if I forgot it?
Contact your carrier’s customer service or use their automated reset system—T-Mobile users can dial #793# to receive a temporary PIN via SMS, while AT&T users should call 611. Once you receive the temporary code, you can create a new 4-15 digit password depending on your carrier’s requirements.
Does carrier matter for voicemail setup?
Yes, carriers have different requirements for password length, setup procedures, and feature availability like Visual Voicemail. AT&T requires 7-15 digit passwords, T-Mobile requires 4-7 digits, and some prepaid carriers may not support Visual Voicemail at all.
Wrapping Up:
Setting up voicemail on your iPhone takes just a few minutes, but it ensures you never miss important messages. If you’re in India, use the carrier-specific codes for Jio, Airtel, or Vi to activate visual voicemail instantly. For any troubleshooting issues, try the 10 fixes outlined above before contacting your carrier. With voicemail properly configured, custom greeting recorded, and Live Voicemail enabled, you’ll have complete control over your missed calls starting today.